# -*- mode: python; -*-
#============================================================================
# Python configuration setup for 'xm create'.
# This script sets the parameters used when a domain is created using 'xm create'.
# You use a separate script for each domain you want to create, or
# you can set the parameters for the domain on the xm command line.
#============================================================================
#----------------------------------------------------------------------------
# Kernel image file.
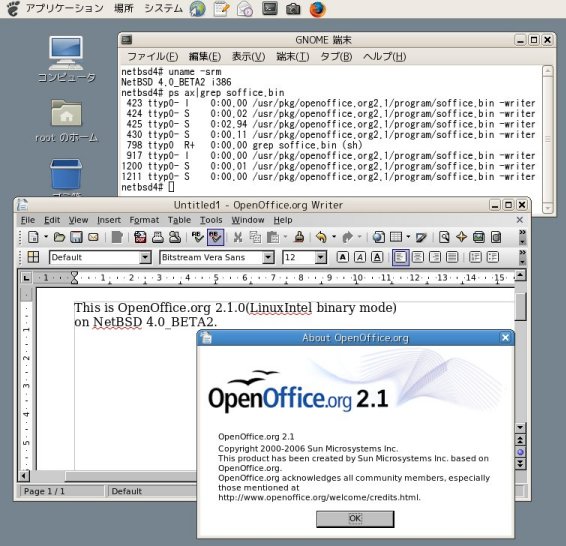
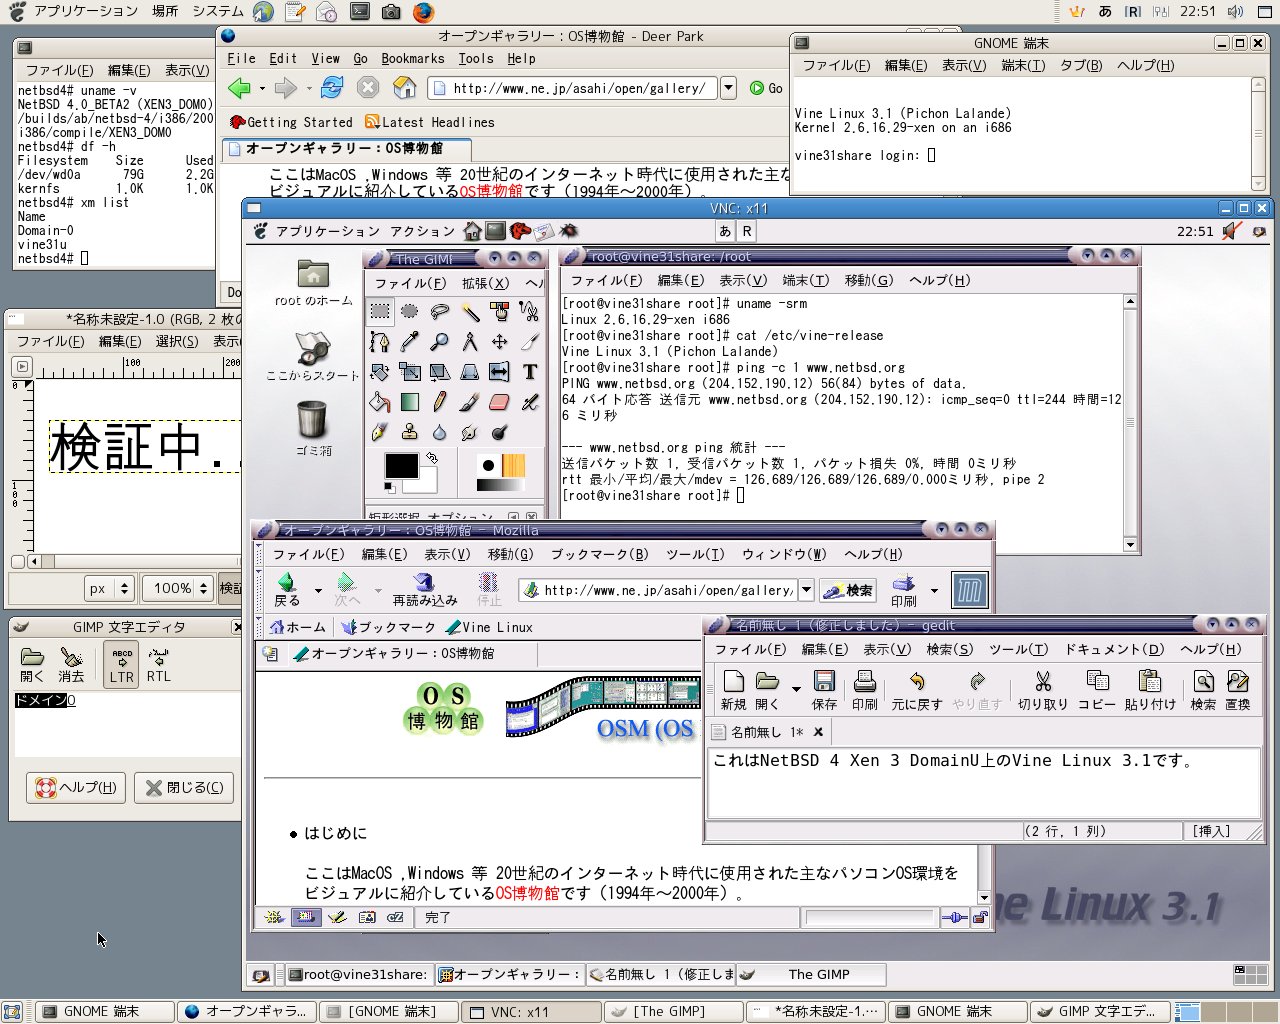
kernel = "/root/vmlinuz-2.6.16.29-xen"
# Optional ramdisk.
#ramdisk = "/boot/initrd.gz"
# The domain build function. Default is 'linux'.
#builder='linux'
# Initial memory allocation (in megabytes) for the new domain.
#
# WARNING: Creating a domain with insufficient memory may cause out of
# memory errors. The domain needs enough memory to boot kernel
# and modules. Allocating less than 32MBs is not recommended.
memory = 220
# A name for your domain. All domains must have different names.
name = "vine31u"
# 128-bit UUID for the domain. The default behavior is to generate a new UUID
# on each call to 'xm create'.
#uuid = "06ed00fe-1162-4fc4-b5d8-11993ee4a8b9"
# List of which CPUS this domain is allowed to use, default Xen picks
#cpus = "" # leave to Xen to pick
#cpus = "0" # all vcpus run on CPU0
#cpus = "0-3,5,^1" # run on cpus 0,2,3,5
# Number of Virtual CPUS to use, default is 1
#vcpus = 1
#----------------------------------------------------------------------------
# Define network interfaces.
# By default, no network interfaces are configured. You may have one created
# with sensible defaults using an empty vif clause:
#
# vif = [ '' ]
#
# or optionally override backend, bridge, ip, mac, script, type, or vifname:
#
# vif = [ 'mac=00:16:3e:00:00:11, bridge=xenbr0' ]
#
# or more than one interface may be configured:
#
# vif = [ '', 'bridge=xenbr1' ]
vif = [ 'mac=00:16:3e:00:00:11, bridge=bridge0' ]
#----------------------------------------------------------------------------
# Define the disk devices you want the domain to have access to, and
# what you want them accessible as.
# Each disk entry is of the form phy:UNAME,DEV,MODE
# where UNAME is the device, DEV is the device name the domain will see,
# and MODE is r for read-only, w for read-write.
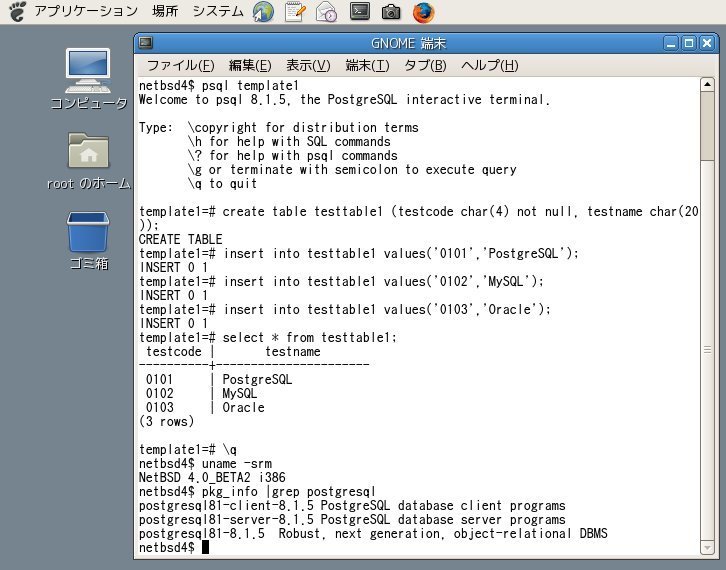
disk = [ 'phy:/dev/wd1e,hda1,w', 'phy:/dev/wd1f,hda2,w' ]
#----------------------------------------------------------------------------
# Define to which TPM instance the user domain should communicate.
# The vtpm entry is of the form 'instance=INSTANCE,backend=DOM'
# where INSTANCE indicates the instance number of the TPM the VM
# should be talking to and DOM provides the domain where the backend
# is located.
# Note that no two virtual machines should try to connect to the same
# TPM instance. The handling of all TPM instances does require
# some management effort in so far that VM configration files (and thus
# a VM) should be associated with a TPM instance throughout the lifetime
# of the VM / VM configuration file. The instance number must be
# greater or equal to 1.
#vtpm = [ 'instance=1,backend=0' ]
#----------------------------------------------------------------------------
# Set the kernel command line for the new domain.
# You only need to define the IP parameters and hostname if the domain's
# IP config doesn't, e.g. in ifcfg-eth0 or via DHCP.
# You can use 'extra' to set the runlevel and custom environment
# variables used by custom rc scripts (e.g. VMID=, usr= ).
# Set if you want dhcp to allocate the IP address.
#dhcp="dhcp"
# Set netmask.
#netmask=
# Set default gateway.
#gateway=
# Set the hostname.
#hostname= "vm%d" % vmid
# Set root device.
root = "/dev/hda1 ro"
# Root device for nfs.
#root = "/dev/nfs"
# The nfs server.
#nfs_server = '169.254.1.0'
# Root directory on the nfs server.
#nfs_root = '/full/path/to/root/directory'
# Sets runlevel 5.
extra = "5"
#----------------------------------------------------------------------------
# Configure the behaviour when a domain exits. There are three 'reasons'
# for a domain to stop: poweroff, reboot, and crash. For each of these you
# may specify:
#
# "destroy", meaning that the domain is cleaned up as normal;
# "restart", meaning that a new domain is started in place of the old
# one;
# "preserve", meaning that no clean-up is done until the domain is
# manually destroyed (using xm destroy, for example); or
# "rename-restart", meaning that the old domain is not cleaned up, but is
# renamed and a new domain started in its place.
#
# The default is
#
# on_poweroff = 'destroy'
# on_reboot = 'restart'
# on_crash = 'restart'
#
# For backwards compatibility we also support the deprecated option restart
#
# restart = 'onreboot' means on_poweroff = 'destroy'
# on_reboot = 'restart'
# on_crash = 'destroy'
#
# restart = 'always' means on_poweroff = 'restart'
# on_reboot = 'restart'
# on_crash = 'restart'
#
# restart = 'never' means on_poweroff = 'destroy'
# on_reboot = 'destroy'
# on_crash = 'destroy'
#on_poweroff = 'destroy'
#on_reboot = 'restart'
#on_crash = 'restart'
#============================================================================
|