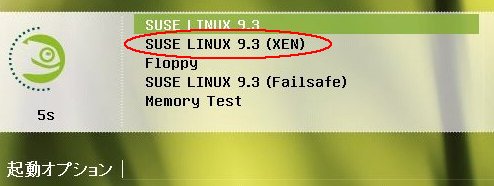
GRUBメニューから「SUSE LINUX 9.3 (XEN)」を選択してブートします。
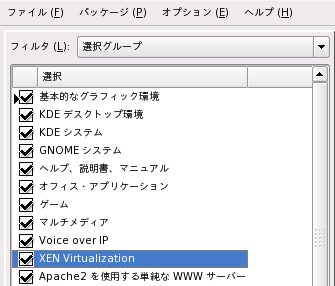
SLP9.3に「XEN Virtualization」パッケージをインストールするとXenデーモン(xend)が自動起動される設定になります。
もし自動起動されない場合は以下のようにします。
# /etc/rc.d/xend start
※chkconfig --level 345 xend onを実行しておくとxendが自動起動します。
# xm balloon 0 400
「xm balloon 0 400」というのはballoonドライバへの指示で、DomainU用メモリの確保のためDomain0の割当メモリを約400MBに変更(削減)するということです。
# cd /etc/xen
# xm create -c xmvine31u
※createはDomainUの作成と起動を指します。
※-cは現在のターミナルをDomainUの仮想コンソールとして使用するオプションです。
DomainUを起動するとブートメッセージが表示されます。
DomainUでは実際のネットワークカードが存在しないため実際のネットワークカードの設定をどうするかの問合せ画面が表示されます。
まず「Welcome to Kudzu」画面が表示されたらEnterキーを押し、次の「Hardware Removed」(ネットワークカードの取り外し)画面でF3キー(Ignore/Keep All)を押します。
この操作によって次回からは本画面は表示されません。
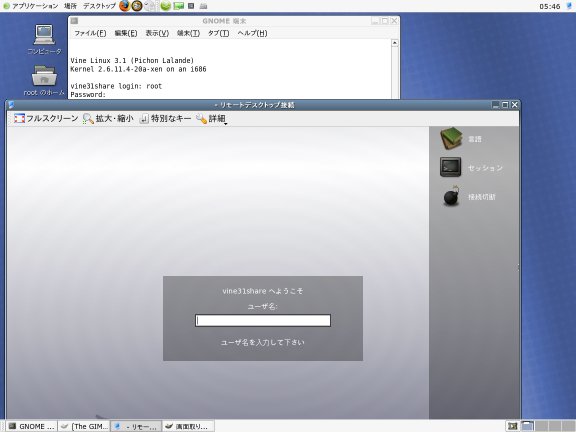
DomainUのブートプロセスのメッセージが流れてテキストログインプロンプトが表示されます。
通常通りログインします。
またログインプロンプトのまま放置しておいてもVNC接続して使用できます。
VNCクライアント機能をもつKrdcを起動します(vncviewerも利用可能)。
接続先に「vine31share:1」を指定して<接続>ボタンで接続します。
※vine31shareはVine Linux 3.1のホスト名です。

VNC接続できるとGDMログイン画面が表示されますので通常通りログインします。
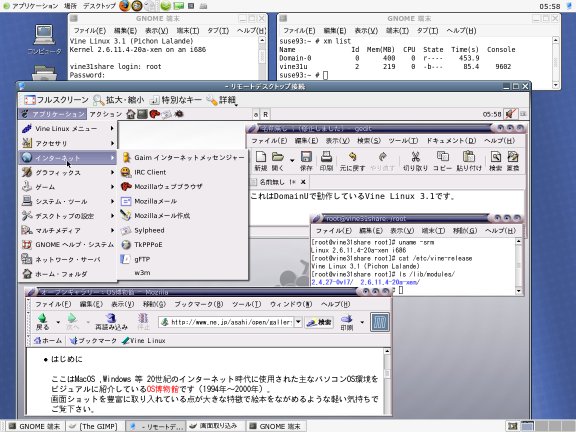
VNCクライアントからDomainU側のGUI操作が行えます(日本語入力も行えます)。
実寸画像はこちらです。